Your Guide to @wallet: How to Set Up & Use It
Think all crypto wallets are the same and nothing can surprise you anymore? Wallet might not reinvent the wheel, but it certainly stands out for its simplicity and convenience. It’s a basic yet functional tool that fits perfectly within the TON ecosystem.
The main advantage of Wallet is its accessibility. No complicated setups or registrations are required - just a Telegram account and the @wallet bot. However, even such a straightforward tool requires some understanding to make the most of it. In this article, we’ll explain how to set up Wallet, explore its features, and show you how to maximize its potential.
How to Create @Wallet
The TON blockchain is a sea of possibilities, and Wallet is your reliable scuba gear, helping you dive deep into the ecosystem without drowning in complexities. Setting it up is so simple that even someone who thinks "TON" is about weight units can handle it.
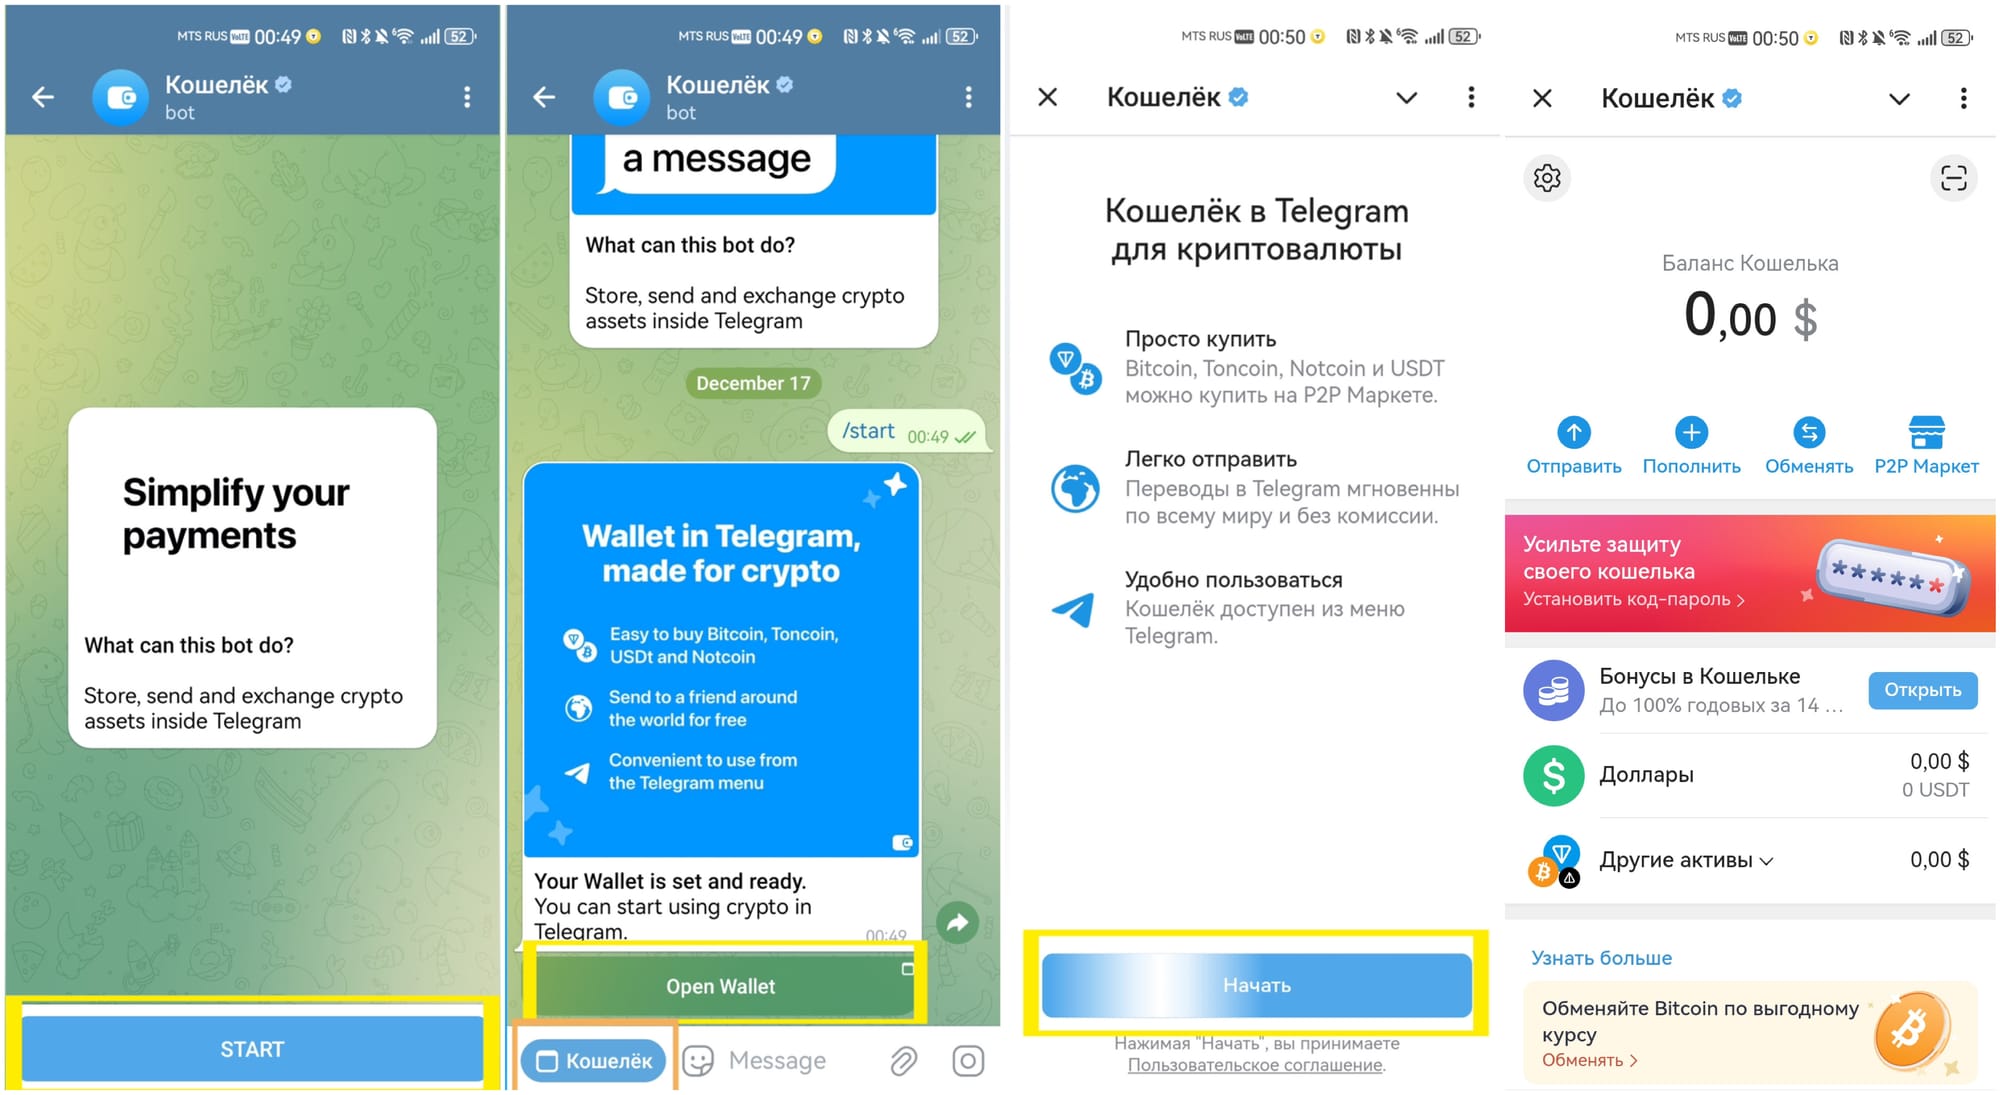
Step 1: Find @wallet
Click the link or type "@wallet" in the Telegram search bar (make sure it’s the verified one with a blue checkmark). You’re now at the digital doorway to the TON world.
Step 2: Create Your Wallet
Press “Start” → “Open Wallet” or go to “Wallet” → “Start”. Done! Your wallet is ready.
Step 3: Secure Your Wallet
Set up a passcode (you’ll need an email for passcode recovery). For added security, enable biometric authentication.
Step 4: Fund Your Wallet
You can top up your balance via:
- The P2P Market.
- Purchasing TON with a bank card.
- Transferring funds from another wallet.
Choose the method that suits you best.
Token Swapping in Wallet
Wallet allows you to swap tokens seamlessly. No third-party apps or complicated settings - everything’s done in just a few clicks.
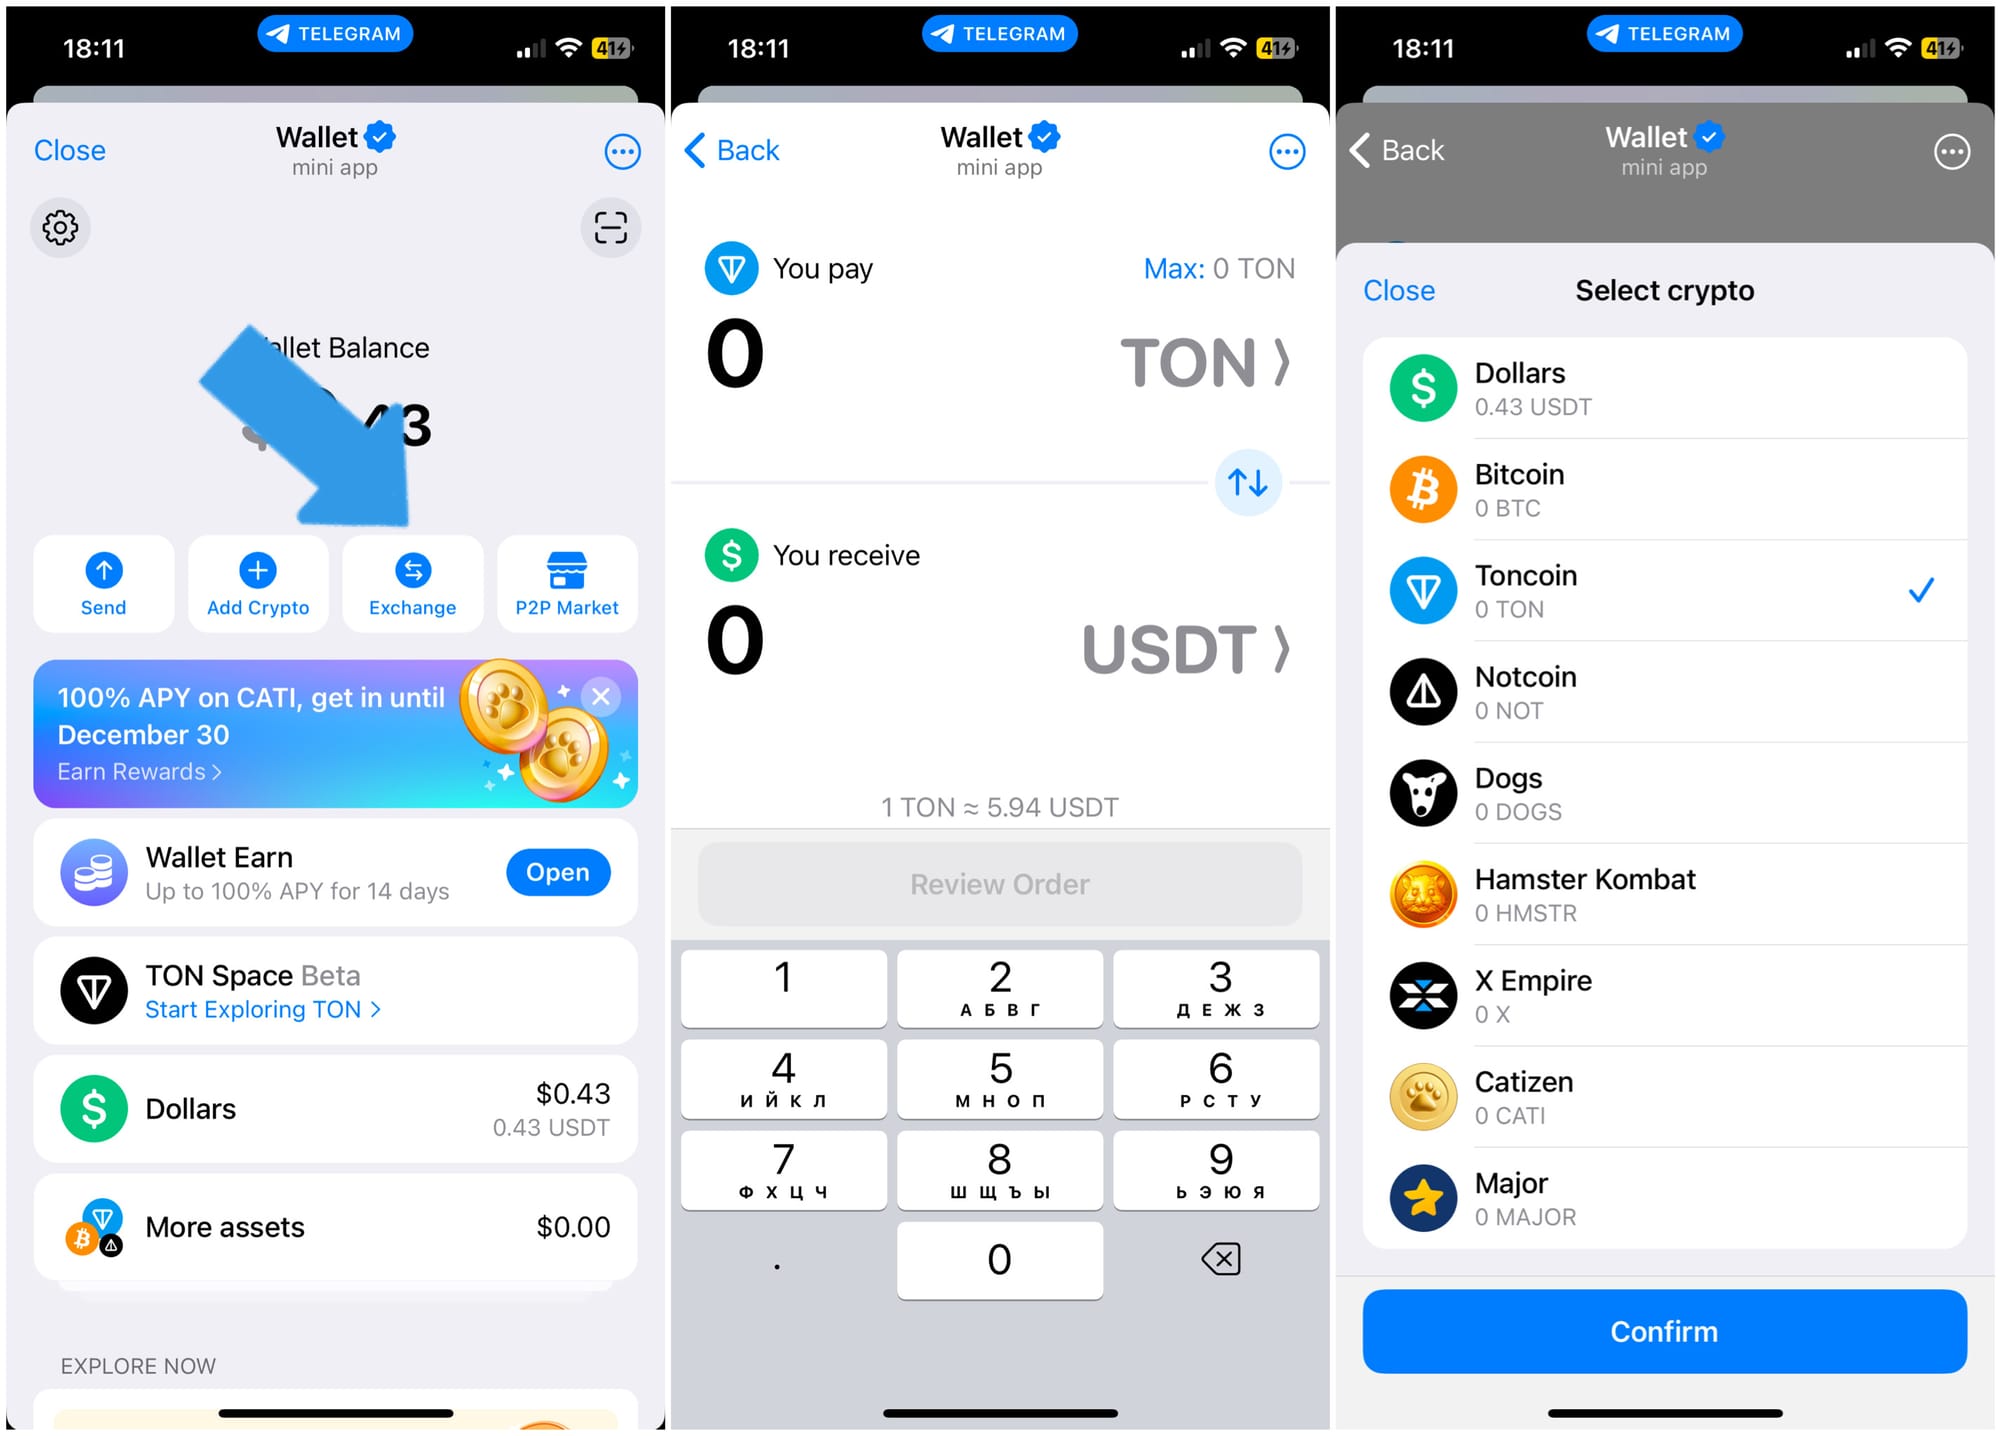
How Does Swapping Work?
- Access your wallet via @wallet.
- Select the “Swap” section.
- Specify the tokens you want to exchange (e.g., TON to USDT).
- Confirm the transaction and receive your assets.
The interface is beginner-friendly, and liquidity is provided through leading decentralized exchanges (DEX).
TON Space: Why You Need It
TON Space is an extension of Wallet that gives you full control over your assets. Unlike the custodial Wallet, where Telegram stores your data, TON Space is a completely non-custodial solution. It’s your gateway to advanced tools in the TON ecosystem: NFTs, Jettons, and decentralized applications (DApps) via TON Connect.
How to Set Up TON Space
- Find TON Space in @wallet.
Enable it in your wallet settings by toggling the switch as shown in the image.

- Recovery Phrase
The recovery phrase is your master key. It consists of 12 words that you can either write down manually or link to your email for convenience.
- Confirm the Phrase
Once you save it, you’ll need to confirm the phrase to ensure it’s correct.
- All Set!
You now have access to your personal TON Space, where you can connect to DApps via TON Connect, send NFTs, and manage your assets.
What Makes TON Space Special?
In TON Space, you can:
- Manage NFTs and Jettons, sending and receiving them via an intuitive interface.
- Connect to DApps through TON Connect.
- Have complete control over your assets - only you can access your wallet and balance.
Wallet Pay: How to Set It Up and Start Using It
Wallet Pay is a beta product from the Wallet team, designed for businesses to accept cryptocurrency payments. It’s ideal for selling goods, services, or even offering coffee with crypto bonuses.
How to Connect Wallet Pay to Your Telegram Bot
- Choose the Right Account
Think twice about which Telegram account you’ll use to connect Wallet Pay. It’s best to use a work or company account rather than a personal one. - Go to Wallet Pay
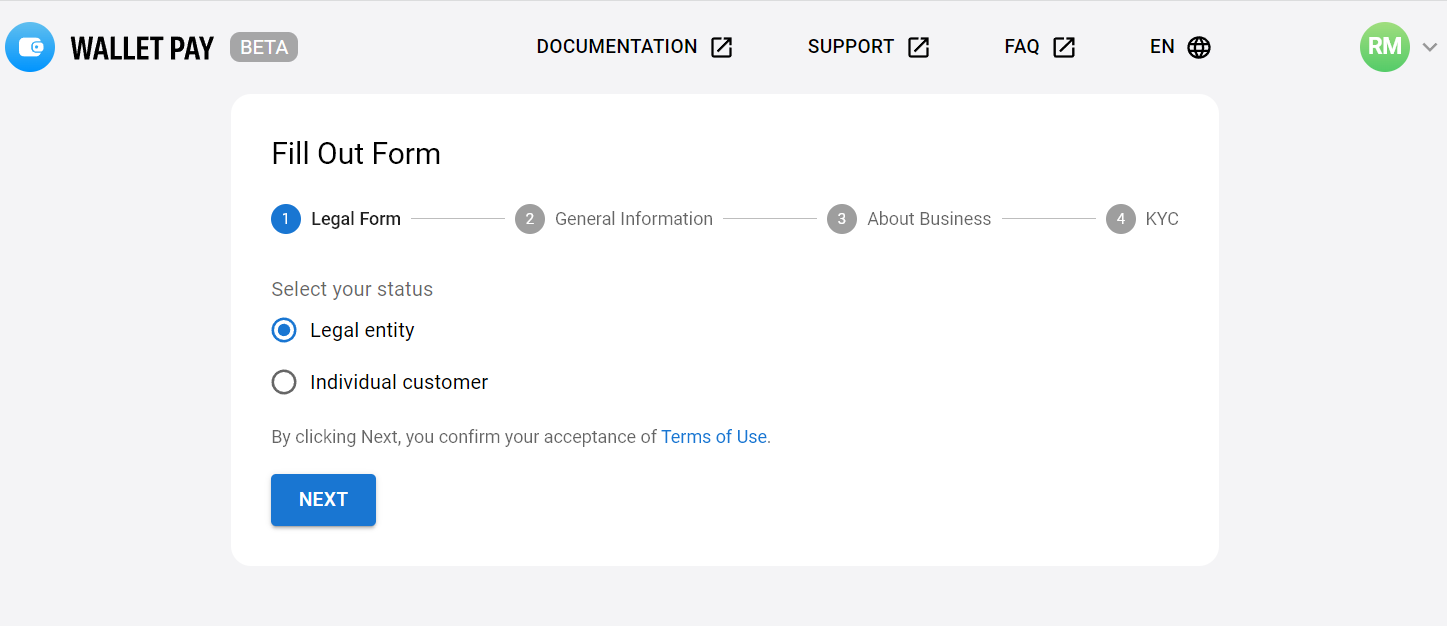
Open pay.wallet.tg and log in with your chosen Telegram account. - Select Legal Status
During the initial setup, specify your user status:
- Legal Entity for companies and organizations.
- Individual Customer for individual users.
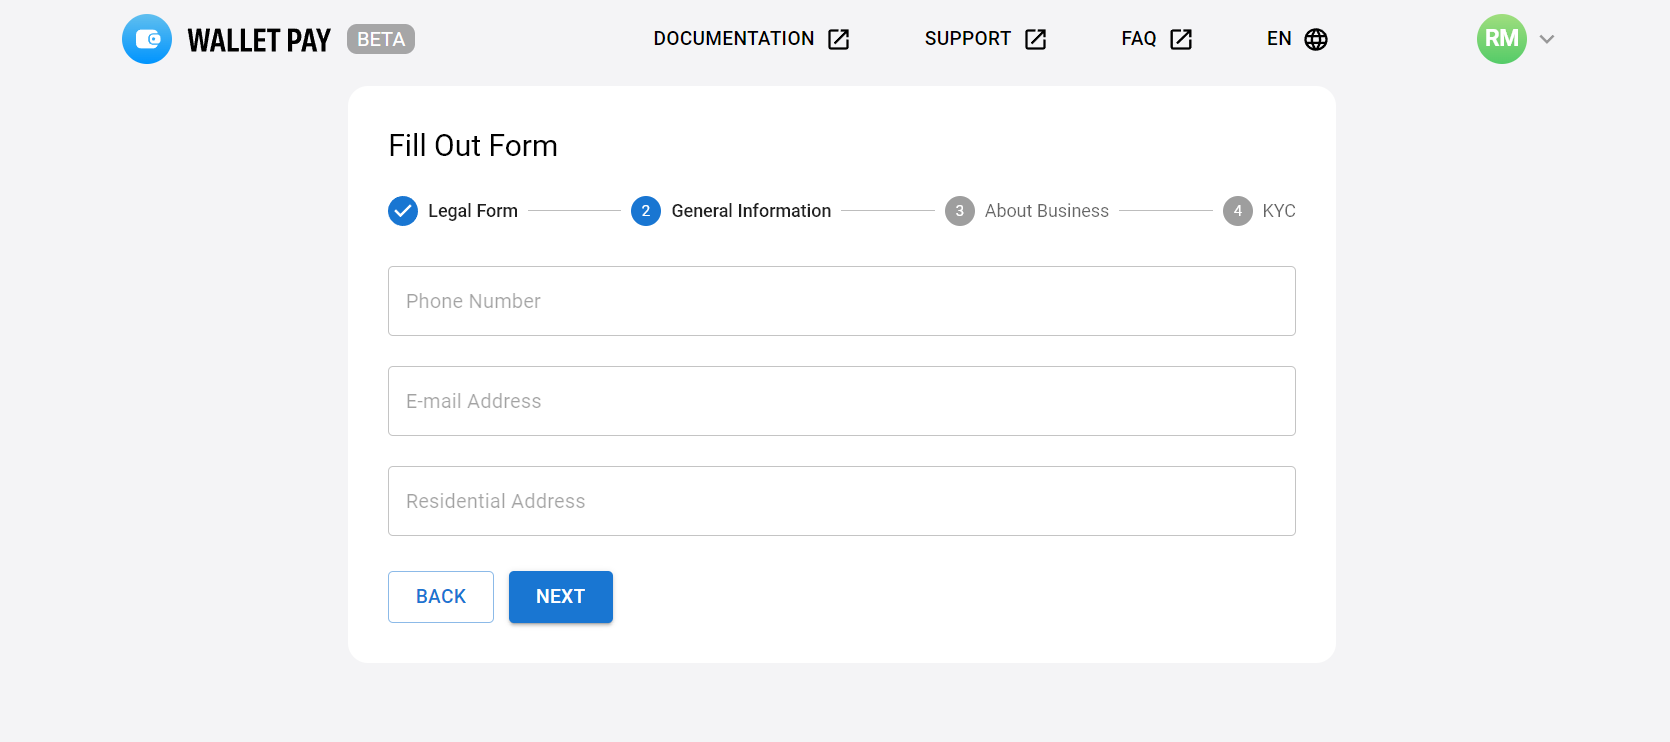
- Then fill in basic details, including:
- Phone number.
- Email address.
- Residential (for individuals) or registered company address.
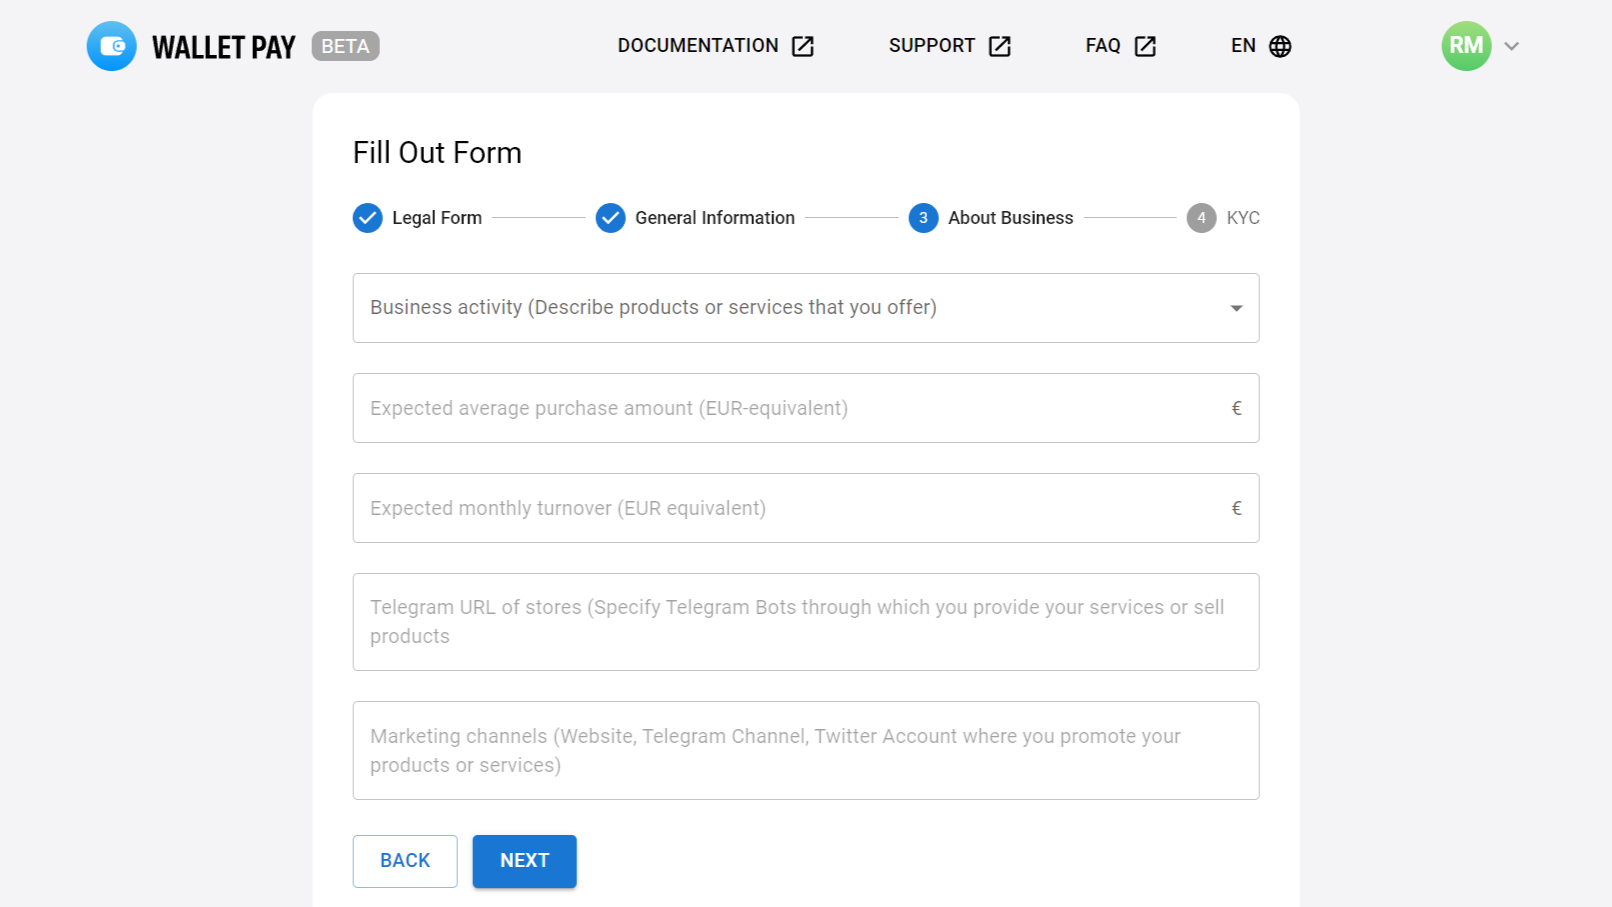
- Provide Additional Details for Businesses
Legal entities need to share information about their business, such as:
- Type of business (goods, services, digital products, etc.).
- Average transaction size and monthly turnover.
- Links to Telegram bots or marketing channels associated with sales.
- Complete the Verification Process
- For individuals: upload an ID and verify through facial scanning.
- For companies: submit registration documents and information about directors and shareholders.
Verification usually takes just a few days, with results sent directly to Telegram - no need to check your email.
Why Choose Wallet Pay?
For Sellers:
– Accept Toncoin, USDT, and BTC directly in Telegram.
– Manage sales through a single interface.
– Set up webhooks for transaction notifications.
For Buyers:
– Quick checkout directly in chat.
– Pay with a card if you don’t have crypto in your balance.
Where to Try It?
To see how it works, check out the demo bot @PineAppleDemoWPStoreBot. You can test payments and see what the purchase process will look like for your customers.
DYOR Swap – maximize your benefits
Oh wow, look at us casually discussing wallets and swaps - totally not leading up to a completely organic mention of DYOR Swap. But hey, since we’re here, might as well tell you about this little tool that just happens to make token exchanges smarter, smoother, and way more profitable. No pressure.
What makes DYOR Swap so great?
DYOR Swap does all the hard work for you. No more hours spent searching for the best rates. The platform automatically compares offers across various DEXs and selects the most profitable route for your swap.
Even if there’s no direct exchange between your tokens, DYOR Swap skillfully uses intermediary tokens to ensure your transaction goes through in the best way possible.
Pros and Cons of Wallet
When it comes to crypto wallets, Wallet has its strengths and a few aspects that might raise questions. Let’s break it down.
Pros
- Integration with Telegram: It’s not just a wallet; it’s part of one of the most popular messengers. No need to download extra apps or struggle with settings - everything is right at your fingertips.
- Ease of Use: Even beginners can figure out Wallet in just a few minutes. The interface is intuitive, and the features are thoughtfully designed.
- Low Fees and High Speed: Straightforward and efficient without unnecessary complications.
- Security: Built-in protection features and recovery options make Wallet a reliable tool.
Cons
- Custodial Approach: Your data is stored on Telegram’s side. While this simplifies usage, it takes away full control of your wallet.
- Limited for Advanced Tasks: If you’re looking to engage in active trading or use complex DeFi applications, Wallet’s capabilities might fall short. In such cases, TON Space or other wallets are better options.
- Fraud Risks: Due to Wallet’s popularity, phishing bots and suspicious links are common. It’s crucial to stay vigilant and only use the official @wallet bot.
Conclusion
Wallet is a convenient and simple tool for working with TON, especially for newcomers. However, if you’re looking for more advanced features or full control over your assets, exploring other solutions is worth considering - and luckily, we’ve got a whole article on the top wallets to help you make the right choice.
Trending tokens
See all